Discus Fish Care: Complete Guide to Tank Setup, Feeding, Breeding, and Health
Care tips, photos, breeding advice, raising fry, filtration, tank setup & community discussion


Quick links - Answers
Brief Description
This page serves as a comprehensive guide to raising Discus fish, covering nearly every aspect of their care. Unlike many other websites, you're invited to share your experiences and questions in the comment section below — and we’ll gladly respond. We also feature individual Discus varieties, so feel free to explore the following pages: Red Discus profile with pictures, Raising Discus – FAQ, General Discus profile, Zebra Discus profile, and Blue Discus profile. If you're keeping Blue, Zebra, Green, or Red Discus, we encourage you to share your insights and tips on the linked profile pages!
📘 Introduction
Discus fish (Symphysodon spp.) are often considered the crown jewels of the freshwater aquarium world. With their striking colors, graceful swimming style, and disc-shaped bodies, they captivate aquarists around the globe. However, their beauty comes with a reputation for being sensitive and challenging to keep—especially for beginners. Their need for stable water conditions, specific diet, and peaceful tankmates sets them apart from many other commonly kept species.
This comprehensive guide is designed to help aquarists—whether you're just starting or looking to expand your knowledge—understand what it takes to care for Discus successfully. From setting up the right environment to mastering breeding techniques and recognizing signs of illness, we’ll cover everything you need to raise happy, healthy, and thriving Discus fish.
🌍 About Discus Fish
📍 Origin and Natural Habitat
Discus fish are native to the slow-moving waters of the Amazon River Basin, primarily in Brazil, Peru, and Colombia. They are most commonly found in calm floodplain lakes, forest streams, and blackwater tributaries, where the water is warm, soft, and slightly acidic. These environments are typically shaded by overhanging vegetation and rich in tannins from decomposing plant material, which gives the water its characteristic tea-like color.
There are three recognized species in the Symphysodon genus:
- Symphysodon aequifasciatus (the blue or brown Discus – previously divided into subspecies haraldi and axelrodi)
- Symphysodon discus (the Heckel Discus)
- Symphysodon tarzoo (the green Discus – once considered S. aequifasciatus aequifasciatus)
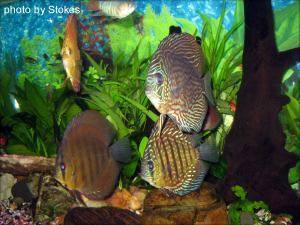
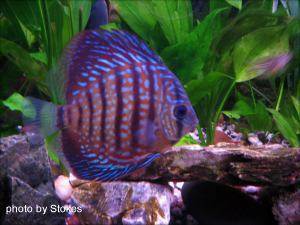
Through selective breeding, many colorful strains have been developed, including red, turquoise, pigeon blood, leopard, and snakeskin variants. Today, most Discus available in pet stores are captive-bred color varieties rather than wild types. These domesticated strains are generally more adaptable and less sensitive to water conditions than their wild counterparts, making them more accessible to a wider range of aquarists.
Appearance and Behavior
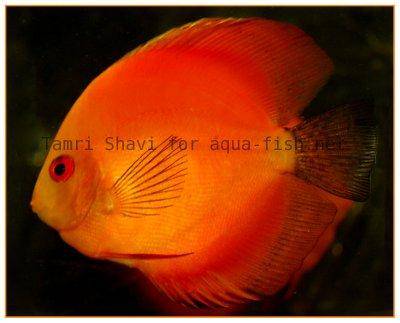
Discus are named after their distinctive disc-shaped bodies, which are laterally compressed and almost perfectly round. They typically grow to about 12–15 cm (5–6 inches), though some individuals can reach up to 20 cm (8 inches) in ideal conditions. Their dorsal and anal fins are elongated and flow smoothly with their movements, giving them a graceful and elegant appearance.
Behaviorally, Discus are peaceful and social, preferring to live in small groups. They thrive in calm, stable environments and can become stressed by loud noises, sudden movements, or aggressive tankmates. When kept in proper conditions, they exhibit fascinating behaviors such as hierarchical structuring within the group, pair bonding, and attentive care for their offspring.
🏗️ Ideal Aquarium Setup
📏 Tank Size and Dimensions
Discus fish require ample space to thrive. A minimum tank size of 200 liters (around 55 gallons) is recommended for a small group of 5–6 Discus. These fish are tall and round, so the height of the aquarium is almost as important as the length. A tank that is at least 45–50 cm (18–20 inches) tall helps accommodate their body shape and swimming style.
Because Discus are schooling fish, they should never be kept alone or in pairs (except during breeding). A group of at least five individuals promotes natural social behaviors and reduces stress.
Discus are very shy and can become stressed easily in high-traffic areas or noisy environments. It’s best to place their tank in a quiet location, away from doorways, hallways, or other sources of disturbance. Avoid direct sunlight and heat sources such as radiators, as these can lead to algae growth and temperature instability. Additionally, taller tanks help reduce stress caused by movement above the aquarium, which can unsettle these sensitive fish.
💧 Water Parameters (Temperature, pH, Hardness, Filtration)
Maintaining pristine and stable water conditions is essential for Discus health. They originate from warm, soft, and slightly acidic waters, and your tank should replicate these conditions as closely as possible:
- Temperature: 28–31°C (82–88°F)
- pH: 6.0–6.8 (slightly acidic)
- Hardness: Soft water is preferred (1–8 °dGH)
- Ammonia/Nitrites: Always 0
- Nitrates: Ideally below 20 ppm
A powerful and efficient filtration system is required, but it should not produce strong currents, as Discus prefer calm water. Canister filters are a popular choice due to their capacity and customizability.
Depending on your local water source and the origin of your Discus (wild or captive-bred), you may need to adjust general hardness. Always ask about the breeder's water parameters before purchase to avoid osmotic shock. Reverse osmosis (RO) units are commonly used to soften water or remove minerals. However, extremely soft water lacking minerals can lead to health issues like Hole-in-the-Head disease (HLLE) and poor growth in juveniles. A balanced approach is best—either remineralize RO water or use peat filtration if your tap water is only moderately hard.
Lighting, Substrate, Decorations, and Plants
Discus prefer subdued lighting that mimics the shady conditions of their natural habitat. Too much bright light can cause stress, so consider using floating plants or adjustable LED lighting.
Substrate can vary depending on whether you're running a planted tank or a bare-bottom setup (popular among breeders). A fine, dark sand substrate helps accentuate Discus colors and creates a more natural aesthetic.
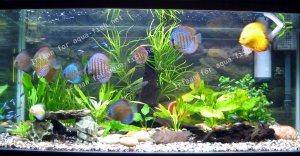
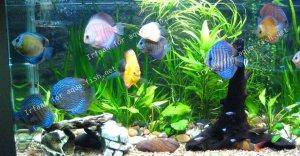
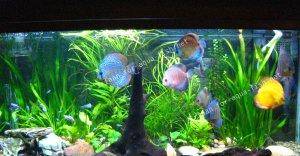
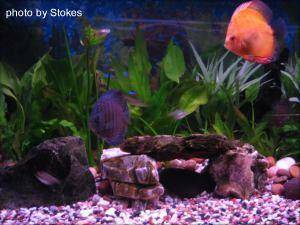
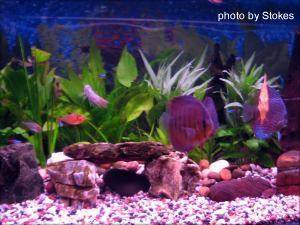
Decorations such as driftwood and leaf litter can add tannins and create a more authentic Amazonian feel. If you choose to add live plants, select hardy, low-light species that can tolerate warm temperatures, such as:
- Echinodorus (Amazon sword)
- Anubias
- Java fern
- Cryptocoryne
- Vallisneria
Images
Water Maintenance and Hygiene
Regular water changes are non-negotiable when it comes to keeping Discus. Perform 25–50% water changes two to three times per week, especially in heavily stocked or feeding-intensive tanks. Use dechlorinated water with matching temperature and pH to avoid shocking the fish. It's also essential to monitor and maintain carbonate hardness (KH); levels should not drop below 4 °dKH, as this can cause sudden shifts in pH, potentially stressing or harming the fish.
Gravel vacuuming, filter maintenance, and routine testing of water parameters should be part of your weekly schedule. Cleanliness is key—poor water quality is the number one cause of disease in Discus tanks.
Acclimatising Your Discus
Introducing Discus fish to a new aquarium should always be done with care. The most effective and safest approach is slow drip acclimatisation, which helps reduce stress and prevents shock caused by differences in water parameters.
This process usually takes 60–90 minutes. Although it may seem time-consuming, many experienced aquarists report excellent results with this method. In most cases, Discus begin exploring their new environment and searching for food within a few minutes after release.
Step-by-Step Acclimatisation Process
- Attach a length of airline tubing to the tank using a plastic clothes peg. Lead the tubing into a clean, food-grade bucket containing the fish in their transport water.
- Connect a flow restrictor to the lower end of the tubing and adjust the drip rate to approximately two drops per second. This allows the tank water to mix slowly with the existing water in the bucket.
- Gently place the Discus on their side in the bucket. This helps prevent sudden movements or injuries as they adjust to the new water conditions.
- Once the water volume in the bucket has doubled, remove some of it and continue the dripping process. Repeat this cycle until the original transport water has been fully replaced by tank water.
- Use a soft net to transfer the fish into the aquarium slowly and carefully. Avoid pouring the bucket water into the tank to prevent contamination.
When properly acclimatised, Discus often start swimming calmly and show interest in food shortly after entering their new home.
Tankmates: What Fish Can Live with Discus
Compatible Tankmates
Discus are peaceful and relatively slow-moving, so tankmates must share these traits. Good companions should thrive in warm, soft, acidic water and not compete aggressively for food. Recommended tankmates include:
- Corydoras catfish – Active bottom-dwellers that help clean up leftover food.
- Cardinal tetras – Small, calm, and native to similar conditions.
- Rummy-nose tetras – Peaceful and visually appealing in schools.
- Otocinclus catfish – Gentle algae eaters.
- Plecostomus (small species like Bristlenose) – Good for algae control without disturbing the Discus.
- Ram cichlids (e.g., Mikrogeophagus ramirezi) – Can cohabit well if tank is spacious and stable.
Always introduce tankmates that are already quarantined and healthy.
Incompatible Species
Avoid fish that are aggressive, overly active, or thrive in cooler water. Examples of unsuitable species include:
- Tiger barbs – Fin-nippers and too fast-paced.
- Large cichlids – May bully or stress Discus.
- Goldfish – Require cooler temperatures and are messy.
- Fast, nippy tetras (e.g., Serpae tetras) – May harass Discus.
- Gouramis – May compete for territory or attention.
Guidelines for Choosing Tankmates
- Match the water parameters – pH, temperature, and hardness should align with Discus needs.
- Match the temperament – Choose peaceful and calm species.
- Avoid aggressive feeders – Discus are deliberate eaters and should not be outcompeted.
- Observe behavior – Always monitor new additions for compatibility.
Pictures
🍽️ Feeding Your Discus
Types of Food (Frozen, Pellets, Live, Vegetables)
Discus fish are somewhat picky eaters, especially when newly introduced to a tank. A varied and high-quality diet is essential for their health, coloration, and growth. Suitable food types include:
- Frozen foods – Bloodworms, brine shrimp, beef heart, daphnia. These are often the core of a Discus diet.
- Pellets and granules – Specially formulated Discus pellets are convenient and nutritionally balanced. Soak them before feeding to prevent bloating.
- Live foods – Can be offered occasionally as a treat (e.g., mosquito larvae, live brine shrimp), but must come from safe, parasite-free sources.
- Vegetables – Though not a major part of their diet, some Discus may nibble on blanched peas, spinach, or spirulina-based foods.
Beef heart mixes are common in Discus-keeping circles, but they should be used in moderation and only if the tank is kept very clean, as these mixes can foul the water quickly.
Homemade Beef Heart Mix (Optional Recipe)
This recipe has been shared among hobbyists and is known to support growth and coloration when used responsibly:
- 250 g beef heart (fat and sinew removed)
- 1/2 clove of garlic (crushed)
- 1 multivitamin tablet (crushed to powder)
- 2 cubes of frozen spinach (thawed)
Cut the beef heart into chunks, freeze them, and grate while frozen. Mix in the garlic and vitamin powder. Then add the thawed spinach and combine thoroughly. Let the mixture rest for a few hours, portion it into small amounts, and store it in the freezer. Feed sparingly, and ensure excellent filtration to handle the organic load.
⏰ Feeding Habits (Frequency, Quantity, Refusal to Eat)
Discus should be fed 2–4 times daily in smaller amounts rather than one large feeding. Juveniles need more frequent meals (up to 5 times per day), while adults do well with 2–3.
Key tips:
- Remove uneaten food within 5–10 minutes.
- Observe the fish during feeding—Discus that isolate themselves or refuse food may be stressed or sick.
- Avoid overfeeding, which leads to poor water quality and digestive problems.
🧪 Supplements for Color and Immunity
Some food products include natural additives that enhance coloration and support the immune system:
- Astaxanthin and carotenoids – Boost red and orange hues.
- Garlic extract – Improves immunity and deters internal parasites.
- Vitamins (especially C and E) – Help reduce stress and support tissue repair.
Adding high-quality spirulina or using supplements can be beneficial, but should not replace a well-rounded base diet.
🧬 Health and Common Diseases
Common Diseases (Hexamita, Worms, Bacterial Infections)
Despite their reputation for being delicate, healthy Discus are quite resilient if kept in optimal conditions. However, they are vulnerable to several specific health issues:
-
Hexamita (Hole-in-the-Head Disease) – Caused by protozoan parasites, often due to poor water quality or stress. Symptoms include small pits on the head and lethargy. This disease also affects species like Geophagus, Uaru, and Astronotus ocellatus.
If left untreated, Hexamita can lead to permanent scarring or death. Treatment includes a heat therapy regimen where the temperature is gradually raised to 36°C (96.8°F) over a couple of days and maintained for 8–10 days. Extra aeration is essential due to lower oxygen levels at high temperatures. If any signs of stress appear, reduce the temperature. In addition to heat, Metronidazole (Flagyl) can be administered orally every three days during this period to aid recovery.
-
Internal worms (nematodes, tapeworms) – Cause weight loss despite good appetite, white stringy feces, and bloating. These symptoms often point to gut parasites, which can sometimes be treated similarly to Hole-in-the-Head disease.
If the fish is still eating, soak live bloodworms or mosquito larvae in a solution of 10 ml liquid Flagyl (Metronidazole) to 200 ml water for an hour, then feed them to the fish. Repeat every 2–3 days for up to 10 days.
If the fish refuses food, an oral application using a syringe (without needle) can be attempted. This involves a mix of 1 part Flagyl, 2 parts Liquifry, and 3 parts water. Gently place the fish on a wet towel, apply the mixture down the throat using the syringe, and wait for the fish to swallow before returning it to the tank. It is normal for excess medication to be expelled from the gills and mouth. This treatment can be repeated twice a day until improvement is seen. Note that treatment of non-eating fish is not always successful.
-
Bacterial infections – Symptoms may include cloudy eyes, fin rot, ulcers, and clamped fins. Often occur after stress or injury.
Effective treatments include Chloromycetin (in powder form), dosed at one teaspoon per 100 liters of water. If effective, improvement is often visible within 8 hours. A second dose may be applied after two days, though the medication naturally dissipates after 12 hours. Store Chloromycetin dry and away from light.
Another option is Oxolinic Acid—prepare a stock solution by dissolving 0.5 g of powder in 500 ml of deionized water, and use 1 ml of this stock per 10 liters of tank water. Effectiveness depends on the specific bacterial strain.
-
Gill flukes and skin parasites – Fish scratch against surfaces or breathe heavily. In adult Discus, gill flukes typically cause labored breathing, but in juveniles (especially around the size of a 10-cent coin), they can be far more serious.
Infected fry may show erratic swimming, sudden spasms, or even temporary paralysis, causing them to sink to the bottom. These parasites are often transmitted from parents if fry remain with them too long after becoming free-swimming. Overcrowding and heavy feeding can exacerbate the problem. Prevention includes early separation of fry and ensuring proper spacing as they grow.
Treatment usually involves Praziquantel, an effective antiparasitic medication. It can be administered via medicated food or added to the water at a dose of 2 mg per liter, repeated after 5–7 days. Ensure proper aeration during treatment and avoid using active carbon in the filter, as it may absorb the medication.
-
Fish Lice (Argulus) – These are among the few aquatic parasites visible to the naked eye and can cause serious harm to aquarium or pond fish. Fish lice use a proboscis to pierce the fish’s skin, injecting digestive enzymes that liquefy tissue, which they then consume. Their feeding causes open wounds, making fish vulnerable to secondary bacterial infections.
Fish lice belong to the same subclass as shrimps and water fleas (Crustacea), and they molt throughout their life as they grow. Mating occurs on the host, but females swim away to lay eggs on plants or décor. The juveniles hatch in about four days and immediately seek a host, making full eradication extremely difficult once they’ve entered the tank.
Symptoms include:
- Fish rubbing or flicking against surfaces in irritation
- Visible black or greenish spots crawling on the fish’s body
- Ulcers or red wounds where lice have fed
Treatment:
- Manual removal of visible adult lice using tweezers (with care)
- A complete tank breakdown is often necessary—removing all plants and décor where eggs may be attached
- Thorough inspection of all fish in the tank to identify and remove visible parasites
- Note: Organophosphate-based treatments were once effective but are now banned in many countries, including the UK, due to their toxicity. Currently, no universally accepted and safe chemical treatment exists, making prevention and quarantine the best defense.
-
White Spot, Velvet Disease, and Costia – These parasitic diseases are uncommon in Discus due to the high temperatures they are typically kept at (around 30°C / 86°F).
However, if they do appear, heat treatment is often sufficient without the use of medication. White Spot (Ichthyophthirius multifiliis) can be treated by raising the temperature to 34°C (93.2°F) for 10 days. Velvet Disease (Oodinium) responds to 34°C treatment within 2 days. Costia, another common parasite, can be eliminated by maintaining 33–34°C (91.4–93.2°F) for 4 days.
Most external parasites cannot survive prolonged exposure to elevated temperatures, making heat a powerful and natural treatment method.
Many Discus health issues are preventable through consistent care, clean water, and a high-quality diet. Early detection and appropriate treatment can often save the fish and prevent outbreaks in the tank.
Symptoms and Prevention
Warning signs to watch for:
- Refusal to eat
- Lethargy or hiding
- Rapid breathing or gill movement
- White or stringy feces
- Discoloration, lesions, or visible parasites
Prevention tips:
- Maintain excellent water quality through regular testing and water changes.
- Feed a varied and nutritious diet.
- Avoid overcrowding and reduce stress factors (e.g., sudden light changes, poor tankmates).
-
Use UV sterilizers if needed for pathogen control. These devices, commonly used in ponds, are increasingly popular in aquariums for their ability to eliminate floating organisms such as parasites, harmful bacteria, and fungal spores that traditional filters cannot remove. UV sterilizers work by exposing the water to ultraviolet light, which disrupts the DNA of microorganisms and prevents them from reproducing.
If you choose to use one, make sure the unit is installed on the output side—after the main filtration—to avoid damaging beneficial bacterial colonies inside your filter. Many modern filters include built-in UV units, but standalone models are also effective if sized correctly:
- 4–10W for aquariums up to 100 liters (24.4 US gallons / 22 Imperial gallons)
- 20–25W for 200–300 liters (53–79 US gallons / 44–66 Imperial gallons)
- 40W or more for tanks over 300 liters (79 US gallons / 66 Imperial gallons)
UV Sterilizers in Aquariums
Note that UV bulbs lose effectiveness over time and should be replaced every 6 months. Always switch off the unit before changing the tube—direct UV exposure can damage your eyes and prolonged skin contact may be harmful. While some aquarists avoid UV sterilizers if water quality is consistently excellent, they can be a valuable tool in disease prevention and water clarity when used correctly.
Quarantine and Hygiene Practices
Always quarantine new fish for 3–4 weeks before adding them to the main tank. This period allows time to observe for diseases and treat any issues without exposing the main population.
Additional hygiene steps:
- Use separate nets and tools for each tank.
- Avoid feeding live food from untrusted sources.
- Rinse hands and equipment before and after tank maintenance.
Discus health starts with prevention—addressing issues early is much easier than curing advanced infections.
🐣 Breeding Discus
How to Sex Discus (Male vs. Female)
Discus fish do not exhibit strong sexual dimorphism, which makes sexing difficult—especially in juveniles. However, adult fish show subtle differences:
- Males often have a slightly more pointed dorsal and anal fin, a broader forehead, and may appear slightly larger.
- Females usually have a rounder belly and may have a more noticeable ovipositor (egg-laying tube) when preparing to spawn.
Best practice is to observe behavior in a group of mature Discus and allow pairs to form naturally.
Choosing a Breeding Pair
Once a compatible pair forms, they will often swim closely, clean surfaces together, and begin to display courtship behaviors. You can encourage pair bonding by:
- Keeping a small group (6–8 juveniles) and letting nature take its course.
- Observing which individuals consistently stay together and protect each other.
- Avoiding forced pairings unless the fish have already shown mutual interest.
Buying a confirmed breeding pair from a reputable breeder is also an option, though often more expensive.
🧫 Creating Ideal Breeding Conditions
Discus prefer to spawn in slightly acidic, soft water with stable parameters:
- Temperature: 28–30°C (82–86°F)
- pH: 6.0–6.5
- Hardness: Soft (1–4 °dGH)
- Lighting: Dim
- Substrate: Bare-bottom tanks are easier to clean and monitor fry.
Use vertical surfaces like spawning cones, tiles, or even heater guards, which the pair will clean and use for egg-laying. Keep the breeding tank separate from the community tank to avoid stress and interference.
In breeding tanks, simplicity is key. Most breeders prefer bare-bottom setups with just a sponge filter, as it minimizes debris and simplifies cleaning. Sponge filters are safe for fry, as they prevent them from being sucked in—unlike power filters. They’re inexpensive and run on an air pump. A corner filter can also be used to add elements like peat, which may help soften the water. Clean the sponge filter weekly by squeezing it in removed tank water to preserve beneficial bacteria.
Preparing and Conditioning Breeders
Conditioning the breeding pair is vital for success. Feed them a high-protein diet for at least two weeks prior to moving them into the breeding tank. A mix based on beef heart is commonly used. Once the pair is moved to the breeding tank, reduce feeding to help maintain excellent water quality.
Spawning doesn’t always happen immediately. It can take days or even weeks for the fish to acclimate and start breeding. Patience is essential, as young pairs may need time and several attempts to get it right.
Tips to Trigger Spawning
- Add a small amount of blackwater tonic to simulate natural conditions
- Perform a partial water change with slightly cooler water
- Temporarily reduce the water level, then slowly raise it over several days
- Separate the pair briefly, then reintroduce them
These tricks can help stimulate breeding instincts, especially in young or hesitant pairs.
👶 Water Conditions for Raising Fry
Discus fry are especially sensitive to water quality and temperature. Maintaining the right environment is essential for healthy development. Recommended conditions include:
- Temperature: 29–31°C (84.2–87.8°F) – slightly warmer than display tanks to encourage faster growth.
- pH: 6.2–6.6 – slightly acidic, but stable. Avoid swings.
- Hardness: Very soft to moderately soft (1–4 °dGH) – fry do best in gentle, mineral-poor water.
- Ammonia and Nitrite: Always 0 ppm – even slight levels are dangerous for fry.
- Nitrate: Below 10 ppm – more frequent water changes are needed due to fry sensitivity.
Use a bare-bottom tank to make cleaning easier and monitor food and waste. Sponge filters are ideal, as they provide gentle filtration and won’t suck in fry. Perform small daily water changes (10–20%) with water that is temperature- and pH-matched.
Egg and Fry Care
After laying, the parents will clean and fan the eggs to keep them free from fungus. Under proper conditions, fertilized eggs hatch within 48–60 hours.
Fry will remain attached to the spawning surface for a few more days while absorbing their yolk sacs. Around day 5, they become free-swimming and begin feeding on the parents’ mucus coating, which contains essential nutrients and immune support. To encourage this behavior, avoid strong filtration or current that could separate the fry from their parents.
Key steps for successful fry rearing include:
- Maintain water temperature between 29–31°C (84.2–87.8°F) for optimal fry metabolism and growth.
- Use methylene blue optionally to reduce fungal risk during the egg stage.
- Keep water parameters stable with soft, slightly acidic water (pH 6.2–6.6, hardness 1–4 °dGH).
- Perform daily water changes (10–20%) using pre-warmed, dechlorinated water.
- Start feeding fry with baby brine shrimp or micro worms around 6–7 days after free-swimming begins.
Parental care usually continues for 2–3 weeks, though some pairs may eat the eggs or fry—especially during early breeding attempts or under stress. With experience and proper setup, most pairs become attentive and successful parents.
Common Breeding Issues
- Egg eating – Often due to inexperience or stress.
- Unfertilized eggs – Usually turn white; may indicate male fertility issues or poor water quality.
- Fungus growth – Can be minimized with good hygiene and antifungal treatments.
- Aggression between the pair – Incompatibility or stress can lead to fighting, and sometimes separation is necessary.
Patience and observation are key—Discus often require multiple attempts before raising fry successfully.
🔄 Behavior and Social Dynamics
Territoriality, Hierarchy, and Bullying
Discus are generally peaceful, but they do establish a social hierarchy, especially in smaller tanks or when space is limited. Dominant individuals may:
- Claim preferred feeding or resting spots
- Chase or nip at weaker fish
- Exhibit body slapping or displaying behavior
This is normal, but excessive bullying can lead to stress and illness.
Preventing Stress and Aggression
To reduce conflict and promote harmony:
- Keep Discus in groups of at least 5–6 to spread out aggression.
- Ensure the tank is large enough with plenty of swimming space.
- Use visual barriers like plants or driftwood to break line of sight.
- Feed in multiple spots to avoid competition.
Avoid keeping a single Discus, as isolation causes extreme stress. Pairs or small groups of three also tend to create unbalanced dynamics—larger groups are better.
Solving Social Problems
If one fish is being relentlessly bullied:
- Rearrange the tank layout to disrupt territory claims.
- Temporarily remove the aggressor or victim to reset behavior.
- In extreme cases, rehome the problematic fish.
Observation is essential. Subtle signs of stress—clamped fins, hiding, loss of color—should not be ignored. Social stability is crucial for long-term Discus health.
Pictures
🛍️ Selecting Discus for Your Aquarium
Choosing Discus for your aquarium can be an exciting yet daunting experience—mostly due to their price and reputation for being sensitive. Unlike common community fish, Discus often come with a higher price tag, which naturally makes aquarists more cautious. Before buying any specimens, it's essential to be well-informed about their care, preferred water conditions, and dietary needs. Although some beginners jump straight into keeping Discus out of fascination, it's strongly recommended to first gain experience with other tropical species.
There are several potential sources for purchasing Discus: specialized importers and dealers, general pet shops, and local breeders. Importers often provide better quality fish and a broader selection, while pet shops may carry limited, sometimes subpar, stock. Hobby breeders may offer fish at lower prices, but their specimens are often smaller and may require more time to mature. Take your time, compare sources, and never rush into a purchase based on impulse.
When inspecting Discus, look for fish with rounded bodies, clear eyes, and active behavior. Healthy fish are bold, come to the front of the tank, and show interest in food. Avoid any that are hiding, breathing heavily, or showing signs of physical deformities such as misshaped mouths, uneven eyes, or abnormal fins. Ask the seller to demonstrate feeding—healthy Discus respond eagerly. Also inquire about the fish's origin, quarantine period, treatments, and current water conditions. A reputable dealer should answer all these questions confidently.
For better adaptation, consider choosing medium-sized juveniles rather than very young fry or full-grown adults. Juveniles are more resilient during relocation and easier to feed than young growing Discus. Always observe the fish for at least a few minutes before buying, check for normal feces (black rather than white or clear), and try to match your aquarium's water parameters with those from the seller. If needed, ask the dealer to hold the fish while you adjust your tank conditions. Being thorough at this stage greatly increases your chances of long-term success with Discus.
Signs of a Healthy Discus
Beyond choosing a reliable source, it's crucial to know how to spot a healthy individual. Use the following checklist when evaluating Discus at a shop or breeder's facility:
- Behavior: Active, upright swimmers that do not hide in corners or breathe heavily.
- Body shape: Round, balanced—avoid triangular or elongated fish.
- Eyes: Clear, proportionate to the body; large eyes suggest stunted growth.
- Gills and breathing: Gills should be fully covered; rapid breathing is a red flag.
- Fins and slime coat: Look for erect fins, full slime coating, and no fraying or clamping.
- Feeding response: Ask the seller to feed them; healthy fish eat eagerly.
- Waste: Feces should be dark, not white or stringy.
- Deformities: Avoid fish with curved spines, chipped eyes, or misshaped mouths.
Beware of juveniles with unusually intense coloration, especially in Blue Diamonds or Turquoise strains—they may have been hormone-treated or are stunted. In Pigeon Blood types, excessive black specks (peppering) can be undesirable.
👶 Tips for Beginners
What to Know Before Buying Discus
Discus are not your average beginner fish. Before purchasing them, it’s important to consider:
- Time and commitment – they require daily attention and frequent water changes.
- Cost – high-quality fish, large tanks, top-tier filtration, and heaters can be expensive.
- Stable environment – Discus do not tolerate sudden changes in water parameters.
That said, the investment is worth it—healthy, vibrant Discus are some of the most stunning fish you can keep.
Getting Comfortable with This Demanding Species
Start by:
- Gaining experience with basic tropical fish (e.g., guppies, tetras).
- Learning about filtration, cycling, and water chemistry.
- Purchasing a group of 5–6 Discus at once, not one by one.
- Observing their behavior closely—you’ll learn to read their mood and health by color, fin posture, and appetite.
Discus are intelligent and curious. Many aquarists form a bond with them—they’ll recognize you and often "beg" for food.
Common Mistakes Beginners Make
- Tank too small – this leads to stress, aggression, and instability.
- Poor water parameters – high pH, hard water, or low temperatures can cause illness.
- Infrequent maintenance – weekly water changes are often not enough, especially in smaller tanks.
- Unsuitable tankmates – aggressive or cold-water fish cause stress.
- Buying from unreliable sources – may result in sick or weak fish.
Reading, asking questions, and talking to experienced hobbyists can go a long way in avoiding these issues.
❓ Frequently Asked Questions (FAQ)
Is Discus Suitable for Beginners?
Not exactly. While not impossible, Discus are generally recommended for intermediate to advanced aquarists. However, a beginner who is willing to learn and invest time and effort—with proper support—can succeed.
How Often Should I Change the Water?
Ideally, 20–30% daily or 30–40% every other day. Clean water is the foundation of Discus health. However, frequent water changes can cause stress if the parameters fluctuate. It’s essential to ensure that replacement water matches the temperature, pH, and hardness of the aquarium. In general, the larger the tank and the fewer the inhabitants, the more stable and forgiving the environment becomes. For tanks 400 liters (105 gallons) or larger, such frequent water changes may not be necessary if water quality remains stable. In such setups, regular water testing is more important than rigid water change schedules, allowing changes to be done based on actual conditions rather than routine alone.
How Long Do Discus Fish Live?
With proper care, they can live 10–15 years, sometimes even longer. Their longevity depends on nutrition, cleanliness, a peaceful environment, and stable water conditions.
Can I Keep Discus in a Planted Aquarium?
Yes—it's actually encouraged! Plants help maintain water quality, reduce stress, and mimic a more natural habitat.
However, you should:
- Choose species that tolerate higher temperatures (e.g., Echinodorus, Cryptocoryne, Anubias).
- Provide enough light and CO₂ if you want denser vegetation.
- Avoid sharp decorations that could damage their delicate bodies.
Why does my Discus hide in the corner of the aquarium?
Discus are shy and sensitive fish. New arrivals often hide while adapting to their surroundings. This is normal behavior and can last from a few days to a few weeks. Spend time near the tank so they grow used to you—regular feeding and a calm environment help them associate your presence with safety.
It's also important that the tank itself provides a sense of security. Use a dark or natural-colored background to prevent reflections and create a defined boundary. Include tall plants or hardscape features where Discus can retreat. A tank that feels too open or exposed will only prolong their stress. Once they feel safe, they will gradually begin exploring and interacting more confidently.
Why won’t my Discus eat? 🍽️❌
This can be caused by stress, poor water quality, or inappropriate food. Give new fish time to adapt (up to 2–4 weeks). Ensure they aren't bullied and test your water parameters. Try offering varied, high-quality foods in small portions.
📜 Conclusion
Discus fish are often seen as the crown jewels of freshwater aquariums—graceful, intelligent, and breathtakingly colorful. Yes, they demand more care and attention than many other species, but the reward is immense. Watching a healthy group of Discus glide peacefully through crystal-clear water is a joy that few other fish can offer.
If you're ready to invest the time, learn continuously, and maintain stable tank conditions, keeping Discus can be one of the most rewarding experiences in the aquarium hobby. Don't be discouraged by the learning curve—every expert aquarist started as a beginner.
With patience, consistency, and passion, your efforts will be returned many times over by these elegant and fascinating fish.

