The Ultimate Guide to Building and Maintaining a Garden Pond
Quick Navigation – Master the Art of Pondkeeping
- Why a Garden Pond Is More Than Decoration
- Planning and Designing Your Pond
- Construction Methods and Step-by-Step Guides
- Water Quality, Sources, and Chemistry
- Plants, Fish, and Ecosystem Balance
- Filtration, Pumps, UV, and Tech Tools
- Seasonal Maintenance Checklist
- Algae, Pests, and Natural Defenders
- Advanced Solutions and Expert Tips
- Design, Lighting, and Garden Integration
- Frequently Asked Questions
- Unit Conversions for International Builders
- Conclusion – Restoration Through Water
Brief Description
This in-depth guide to garden pond building and maintenance walks you through every step of the process—from planning and construction methods to water chemistry, plant and animal care, seasonal upkeep, and advanced techniques. Whether you’re creating a decorative feature or a full ecosystem, this resource provides clear guidance for beginners and experienced pond keepers alike. Learn how to balance technology with nature and build a pond that thrives year-round.
🌿 Why a Garden Pond Is More Than Just Decoration
When people imagine a garden pond, they often picture a pretty feature next to flowers or a trimmed lawn. But a true garden pond is more than that. It’s a living, breathing part of your outdoor space—an ecosystem in miniature.
🔸 A Living System, Not a Decoration
A healthy garden pond brings together fish, plants, insects, frogs, and bacteria. These life forms create a balance—plants provide oxygen, animals produce waste, and microorganisms clean the water. A pond changes with the seasons—it grows, adapts, and teaches patience.
Building a pond is more than landscaping—it’s a quiet, lasting dialogue with nature.
🔸 Why a Pond Matters
Unlike many modern projects, a garden pond doesn’t chase trends or instant results. It invites observation, care, and connection with natural rhythms. In return, it offers calm, beauty, and a sense of purpose.
You don’t just “own” a pond—you care for it. And it gives back, quietly and meaningfully.
🔸 Designed for Everyone
A beautiful pond doesn’t require luxury equipment. With basic tools, thoughtful design, and steady attention, anyone can create a space where life flourishes—whether in a large garden or a modest yard.
🧱 Planning a Garden Pond – A Solid Start for Every Backyard
🔹 What’s the Goal: Decoration or Habitat?
Before you dig, define your goal. Will your garden pond be a decorative feature, or a habitat for fish and aquatic plants? Display ponds often need less depth and equipment. Habitat ponds require more careful planning.
There’s no wrong answer—but knowing your purpose helps guide decisions about shape, materials, and maintenance. A pond without a clear plan often becomes a burden instead of a joy.
🔹 Choosing the Best Location and Sunlight
Location matters. Most aquatic plants need sun, but too much direct sunlight can overheat water and cause algae blooms. Avoid placing the pond beneath large trees—falling leaves reduce light and clog filters.
A mix of sun and shade is best. Plan for practical needs too, like water access and electricity. It’s easier to install cables and pipes before digging begins.
🔹 Size, Shape, Safety, and Budget
Decide how large the pond should be, and which shape fits your garden—round, square, or organic. Small ponds are easier to build but can be less stable in temperature and water quality.
If children or pets are nearby, consider safety features. Raised walls, shallow edges, or fencing help prevent accidents. And don’t forget to budget for essential gear—liner, pump, filter, and plants—not just excavation.
🔹 Smart Building on a Budget
You don’t need luxury equipment to succeed. Many great ponds are built with basic tools, reused materials, and good advice. Whether you use a preformed tub, pond liner, or a heavy-duty tarp—what matters is that it’s watertight and stable.
With care and planning, anyone can build a functional, beautiful pond—no matter the budget.
🔹 Water Volume Calculator: Choose the Right Pump and Filter
Knowing your pond’s volume helps select the right filter, pump, and number of fish. Use one of these formulas depending on your units:
- UK Gallons:
Length (ft) × Width (ft) × Depth (ft) × 6.25 = Volume in UK gallons - US Gallons:
Length (ft) × Width (ft) × Depth (ft) × 7.48 = Volume in US gallons - Liters (Metric):
Length (m) × Width (m) × Depth (m) × 1000 = Volume in liters
For ponds with sloped sides or irregular shapes, estimate the average depth and divide the area into simple rectangles.
Recommended minimum depth: 60–80 cm (approx. 24–32 inches) for temperate climates. In colder areas (below -15 °C / 5 °F), aim for 90–100 cm (approx. 36–40 inches) to avoid full freezing and allow fish to overwinter safely.
Ponds shallower than 30 cm (12 inches) freeze quickly in winter and overheat in summer—making them unsuitable for most fish.
🔹 A Hole Is Just the Beginning
Excavating is only step one. To support life, you’ll need a pond liner, pump, filter, aquatic plants, and maintenance tools. Plan these in your budget from the start.
DIY can save money—but investing in quality gear saves time and trouble later.
🔹 Sketch It First – Your Pond Blueprint
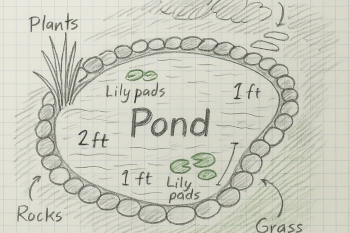
Before digging, sketch your plan. Use string or a garden hose to outline the pond’s shape on the ground. Mark zones for shelves, plants, filters, and waterfalls.
This simple step prevents costly mistakes and gives you a clear roadmap. A well-planned design leads to better, longer-lasting results.
🧱 Landscape Integration: Paths, Slabs, and Borders
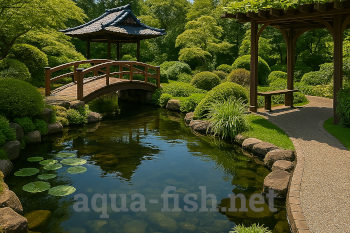
For a more formal look, line the pond’s edge with stone slabs. Extend the area with walking paths or terraced levels, perhaps even with archways covered in climbing plants. These features transform the pond into a peaceful garden retreat and invite strolls during quiet evenings.
🛠️ Pond Construction Methods – From Budget Builds to Long-Term Designs
🔹 Which Method Is Right for You?
There’s no single best way to build a garden pond. Your method depends on your budget, available space, long-term goals, and the time you're willing to invest. Whether you're a weekend hobbyist or an experienced DIYer, here are the most common construction types:
- Plastic Containers: Ideal for quick, small projects. Easy to install and budget-friendly, but limited in size and visual appeal.
- Tarpaulin (Tarp): Affordable and flexible. Good for temporary or experimental ponds. Not UV-resistant—can degrade over time.
- Pond Liners (EPDM or PVC): Durable and adaptable. Great for natural-looking designs. Requires careful base prep to prevent leaks.
- Preformed Shells: Rigid molds made of plastic. Easy to set up, reliable shape. Limited sizes, but fast installation.
- Concrete Ponds: Strongest and most permanent option. Best for large or formal ponds. Requires more tools, skill, and time.
🔹 Pros and Cons by Material
Plastic Containers: Excellent for beginners and decorative setups. Not ideal for fish or deep-rooted plants.
Tarps: Simple to work with and inexpensive. Best suited for short-term use or testing layouts.
Pond Liners: Provide a balance between flexibility and strength. EPDM is superior to PVC in UV resistance and flexibility. Base preparation is critical.
Preformed Shells: Maintain their shape. Be sure to level carefully to avoid uneven waterlines.
Concrete: Long-lasting and customizable. Ideal for koi ponds or feature ponds. More effort, but built for decades.
🔹 Step-by-Step: How to Build a Garden Pond
- Mark the Shape: Use string or a hose to outline. Plan zones: shallow for plants, deep for fish.
- Excavate the Area: Dig gradually, with sloped sides to prevent collapse. Add ledges for plants if desired.
- Prepare the Base: Remove roots and rocks. Add a sand bed or underlay to protect the liner.
- Install the Liner or Shell: Carefully press into shape. For concrete, install mesh and pour in layers.
- Add Water Gradually: Fill a few inches to settle the liner. Smooth out folds and adjust positioning.
- Finish the Edges: Use rocks, bricks, or turf to secure the perimeter and match your garden design.
- Install Equipment: Set up pump, filter, and tubing before full fill. Test everything for leaks.
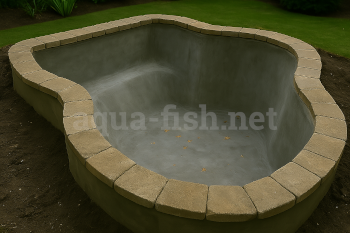
This image shows a nearly completed concrete pond—before waterproof coating and filling. Edges are paved, but sealing is still needed before adding water.
🔹 Practical Tips for DIY Pond Builders
You don’t need professional equipment to get excellent results. Many ponds are built using second-hand materials—bathtubs, old bricks, or reclaimed stones can work beautifully.
Always check your levels. Place a wooden board across the pond and use a spirit level. Even a small tilt can cause visual imbalance when filled.
🔹 Calculating Water Volume
Knowing your pond’s exact water volume is crucial for sizing filters, adding treatments, and ensuring fish health. Use one of the following formulas:
- UK Gallons:
Length (ft) × Width (ft) × Depth (ft) × 6.25 = UK gallons - US Gallons:
Length (ft) × Width (ft) × Depth (ft) × 7.48 = US gallons - Liters (Metric):
Length (m) × Width (m) × Depth (m) × 1000 = Liters
💡 Tip: Estimate average depth for irregular shapes. Never guess—accurate calculations lead to better filtration and healthier ecosystems.
💧 Water as a Living Element – What Belongs in the Pond and What Doesn’t
🌊 Topping Up the Pond – Source Matters
Water isn’t just a filler—it’s the lifeblood of your pond. Its quality directly affects the health of fish, plants, and beneficial bacteria. When topping up, always consider the source:
- Well Water: Usually free of chlorine but may contain iron, sulfur, manganese, or other minerals. In some regions, it may also carry coliform bacteria (if the groundwater is contaminated) or pesticide residues (if agricultural fields are nearby). Always test well water before use.
- Tap Water: Generally safe for humans, but not automatically for pond life. It often contains chlorine or chloramine, which must be neutralized with a water conditioner. Regular testing is essential, especially in older systems where contaminants like radon may seep in through cracked pipes—especially in regions with natural uranium deposits.
- Rainwater: Soft and naturally free of chlorine, but can be acidic or polluted if collected from dirty roofs or gutters. Use only if cleanly harvested.
Top up slowly. Sudden changes in water temperature or chemistry can shock fish and disrupt biological filtration.
🧪 Water Quality – The Unseen Foundation
Clear water isn’t always clean water. A balanced pond depends on stable parameters. Monitor these key values:
- pH: Ideal range is 6.8 to 8.2. Large or sudden changes can damage fish gills, suppress immunity, and cause death. A shift of 1.0 pH means tenfold change in acidity or alkalinity. Test regularly and avoid drastic fluctuations.
- Chlorine and Chloramine: Both are harmful to fish and beneficial bacteria. Chloramine (chlorine ammonia) is more persistent and cannot be removed by letting water sit. Always use a conditioner that treats both substances before adding tap water.
- Nitrate (NO₃⁻): Should be below 40 mg/L. Excess promotes algae and stresses fish.
- Nitrite (NO₂⁻): Toxic even at low levels. Should be 0 mg/L in healthy ponds.
- Ammonia (NH₃): Extremely harmful. Also should be 0 mg/L. Spikes signal filter failure or overfeeding.
Use a liquid test kit regularly. It’s the best early warning system for pond health.
⚠️ Chemicals or Natural Balance?
Quick fixes can cause long-term imbalance. Before using treatments, ask yourself: “Am I solving the root cause or just treating symptoms?”
- Algaecides: Kill algae quickly but reduce oxygen and may harm fish or plants. It’s better to address sunlight and nutrient levels.
- Disinfectants (e.g., methylene blue): Use only in emergencies or in a quarantine tank. Not for routine pond use.
- Fertilizers: Use only aquatic plant-safe formulas. Garden fertilizers can trigger algae blooms and chemical imbalance.
Real stability comes from balance: enough plants, consistent parameters, and mindful care. In a well-managed pond, chemicals are rarely needed.
In a thoughtful pond, every drop of water has purpose.
🌱 Plants and Animals – The Working Ecosystem of a Pond
🌿 The Role of Aquatic Plants – More Than Just Decoration
Healthy ponds aren’t ruled by algae—they thrive with helpful aquatic plants. These green allies support a clean, balanced ecosystem:
- Shade: Floating plants like water lilies and Salvinia block sunlight, reducing algae and keeping fish cool.
- Filtration: Submerged plants such as Anacharis and Hornwort absorb excess nutrients that would otherwise fuel algae growth.
- Oxygenation: Aquatic plants release oxygen during the day, supporting fish and beneficial bacteria.
These are not decorations—they're essential life-support systems.
🏞️ Marginal and Shelf Plants – Building a Living Border
Marginal plants grow in shallow water or on pond shelves. They filter water, provide shelter, and soften pond edges:
- Examples: Iris pseudacorus (Yellow flag), Typha (Cattail), Lythrum salicaria (Purple loosestrife)
- Planting tip: Use pond baskets with aquatic soil and a gravel top layer. Place on ledges or shallow steps.
- Edge planting: Grow moisture-loving plants like Houttuynia or Marsh marigold along the pond’s edge for a natural transition into the garden.
🐸 Allies of the Pond – Nature’s Little Helpers
A pond is more than fish. Other organisms contribute to its balance:
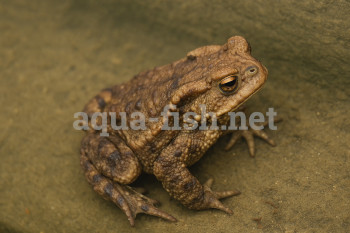
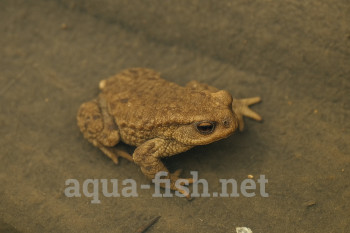
- Frogs: Eat insects, and tadpoles help clear algae. Their presence adds both function and charm.
- Dragonflies: Their larvae feed on mosquito larvae, offering natural pest control.
- Snails: Consume algae and leftovers. Choose slow-breeding varieties to prevent overpopulation.
- Clams and crayfish: Filter water and eat organic waste. Use species compatible with your fish and climate.
Think of them as part of your pond’s natural cleaning crew.
🐟 Choosing the Right Fish – Beauty With a Purpose
Fish bring life and color—but they require care and add biological load. Choose species suited to your pond’s size and conditions:
- Goldfish: Hardy and beginner-friendly. Avoid fancy types in outdoor ponds unless protected from cold and predators.
- Koi: Beautiful but demanding. Require deep water, high filtration, and a spacious setup.
- Orfe: Fast, social swimmers that thrive in larger ponds with good circulation.
- White cloud mountain minnows: Ideal for small or shallow ponds. Peaceful and tolerant of cool temperatures.
- Plecos: Algae-eaters that need warmth and space. Not suitable for unheated outdoor ponds in temperate zones.
📏 Stocking Principles – Finding the Right Balance
- When to add fish: Wait at least two weeks after setup. Ensure stable water, active filtration, and established plants.
- How many fish: Follow the rule of 1 inch (2.5 cm) of fish per 5 gallons (23 L) of water. Overstocking leads to poor water quality.
- How to introduce fish: Float the sealed bag for temperature adjustment. Then slowly mix pond water into the bag before releasing the fish.
Fish are not decorations. They’re part of the living system—and rely on your care.
When balance is achieved, the pond becomes self-regulating and full of life.
💾 Technology and Maintenance – Ensuring the System Never Fails
🛠️ Filtration – The Cornerstone of a Healthy Pond
Filtration is the foundation of any healthy pond. It keeps the water clear, removes harmful waste, and supports fish and plant life.
- Mechanical filtration: Catches physical debris like leaves, food, and sludge.
- Biological filtration: Uses beneficial bacteria to convert harmful ammonia and nitrites into safer nitrates.
- Chemical filtration: Removes toxins and odors, usually with activated carbon. However, activated carbon does not remove all harmful substances. It is ineffective against ammonia, nitrites, nitrates, and certain dissolved heavy metals like lead or copper. It also cannot neutralize strong acids, some pesticides, or chloramine. Chemical filtration should therefore be viewed as a support—not a substitute—for biological balance and regular water testing.
Sketching your filtration setup in advance helps you stay organized and efficient.
⚠️ Important Safety Note
Indoor aquarium filters are not designed for outdoor use. They lack proper waterproofing, insulation, and power safety features. Always use weather-resistant, pond-rated filtration systems outdoors to avoid equipment failure or electrical hazards.
⚙️ Water Pumps – Circulation and Control
Pumps keep the pond water moving, which improves oxygen levels and keeps mosquitoes away. Choose a pump with the right flow rate based on your pond's volume and your filter’s capacity. Flow rate is usually measured in GPH (gallons per hour) or LPH (litres per hour).
As a general rule, aim for a pump that can circulate the entire pond volume once every hour. For example:
- 1,000 gallons → 1,000 GPH pump
- 3,800 litres → 3,800 LPH pump
Too much power can stir up sediment, stress your fish, and overwork the filtration system. Always check both the pump’s capacity and the actual flow after installation, especially if you’re pumping to a waterfall or elevated feature.
💧 Filtration Meets Aesthetics: Run Your Filter to a Waterfall
Instead of letting the filtered water return directly to the pond, route the outflow to a small waterfall or stream. This boosts oxygenation and adds soothing sound and movement. Surround the area with lush vegetation to create a seamless, natural look.
🧹 Skimmers and Nets – The First Line of Defense
Skimmers remove leaves and floating debris before they rot and pollute the water. Nets are great for daily clean-up. A simple net and five minutes a day can make a big difference.
🔆 UV Sterilizers – 24/7 Protection Against Invisible Invaders
These devices kill algae and harmful microorganisms using ultraviolet light. They are essential in maintaining water clarity and protecting your pond from invisible invaders.
UV sterilizers should run 24 hours a day for continuous protection. Microbes multiply quickly, and even a short lapse can give harmful populations a chance to rebound. Think of it as constant surveillance at the microbiological border—always alert, always ready.
It’s important to understand: even though sunlight has some disinfecting power, it does not reach deep into the water column where parasites and bacteria hide. UV rays from the sun scatter or are blocked by surface movement, shade, and water turbidity. This is why a dedicated UV sterilizer is crucial—it targets pathogens at the flow level, inside a controlled chamber where the dosage is strong and direct.
However, not all invaders fall before the ultraviolet beam. Some organisms are naturally resistant to UV exposure—especially those with protective coatings or complex life cycles. For example, Ichthyophthirius multifiliis (commonly known as "Ich" or white spot disease) can survive UV light during certain stages, and microsporidian parasites often remain unaffected.
UV sterilizers are powerful allies, but not invincible—they should be part of a broader, multi-layered defense system including filtration, water changes, and biological balance. Keep your unit running continuously, replace the bulb every 6 months, and you’ll have a frontline defense worthy of any pond guardian.
💨 Aeration – Let the Pond Breathe
Warm water holds less oxygen than cold water. At 0 °C, water can hold around 14.6 mg/L of oxygen; at 30 °C, only about 7.6 mg/L. That’s nearly half as much.
This means that in summer—or in ponds with many fish or decaying plants—oxygen levels can drop dangerously low. Use air pumps with diffusers, waterfalls, or fountains to keep the water moving and oxygenated. Oxygen is invisible, but it is life. Especially in hot weather, it can be the difference between a thriving pond and a dying one.
🌡️ Thermometers and Seasonal Feeding
Water temperature affects how much and what type of food your fish need. Cold months call for wheat germ–based food. Always monitor the temperature and adjust feeding and testing routines accordingly.
🔬 Test Kits – Tools for Monitoring Water Health
- Check pH, ammonia, nitrites, nitrates, and oxygen regularly.
- Test weekly during warm seasons and after changes (e.g., adding fish or topping up water).
- Record your results—data helps you notice trends and prevent problems early.
🕸️ Pond Netting – Protection for All Seasons
Netting keeps out leaves, stops predators like herons or cats, and adds a safety layer for children and pets. It’s a simple but powerful tool.
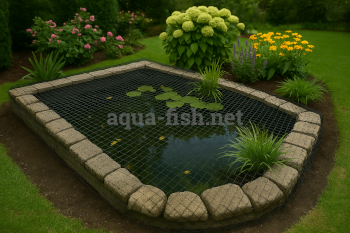
This image shows a mature pond protected with overhead netting. The mesh keeps out leaves, birds, and curious animals—without disturbing the beauty of the pond.
🧪 Chemicals – When All Else Fails
- Algaecides: Work quickly, but can harm beneficial life. Use only when natural methods fail.
- Fertilizers: Use sparingly and only products made for aquatic plants to avoid algae blooms.
- Disinfectants: Like methylene blue should be used in a separate tank. Always add good bacteria back into the filter afterward.
🔎 Natural Helpers – Snails, Mussels, and Crayfish
- Snails: Eat algae and uneaten food. Choose non-invasive species.
- Mussels (Freshwater Clams): Act as natural filter feeders—they remove fine particles, uneaten food, and organic waste from the water. To thrive, they require:
- A clean, well-oxygenated environment
- A sandy or fine substrate to partially burrow into
- No exposure to copper or sudden ammonia spikes
- Crayfish: Clean waste but may harm fish—choose species carefully based on your pond setup.
🔥 Winter Heaters and De-Icers
Frozen ponds trap gases. Heaters or de-icers maintain a small hole in the ice, allowing gas exchange and keeping fish alive. Use low-wattage models and plug them into safe outdoor sockets.
Never break the ice with a hammer, axe, or heavy object. The shock waves from such impact can be harmful or even fatal to fish, causing internal injuries or severe stress. Always choose gentle, non-disruptive methods—such as floating de-icers or heated rings—to maintain oxygen exchange and protect the health of your pond’s inhabitants.
💡 Lighting – Beauty and Safety After Dark
Pond lights make your pond beautiful at night and safer to walk near. Use solar, LED, or low-voltage underwater lights for a calm, glowing effect. Bonus: highlight fountains or waterfalls for dramatic evening views.
💦 Fountains – Oxygenation With Style
- Doubles as: A water feature and a source of oxygenation.
- Types: Bell (dome), Blossom (tiered), Frothy (bubbled), or Statue-based.
- Fit matters: Don’t overwhelm a small pond with a large spray—avoid water loss.
- Lighting: Many fountains support solar or LED lighting for extra flair.
- Efficiency tip: Combine your fountain with your pump or filtration system for multi-purpose flow.
Solar lights are ideal when you want a no-cable solution—perfect for remote corners or DIY setups. If you're installing mains-powered lighting, always consult a qualified electrician to ensure safety and compliance with outdoor electrical standards.
💸 Fountain Prices: Something for Every Budget
Pond fountains range from simple floating models (~£25 / $50) to elaborate multi-tiered sculptures exceeding £1000 / $2000. Choose one that complements your pond’s size and style. Even small pumps often come with interchangeable heads to vary the water pattern.
🗓️ Seasonal Pond Maintenance – A Year-Round Plan for Stability
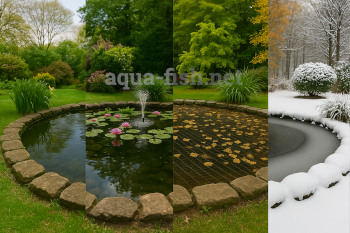
This image illustrates how a garden pond transforms through spring, summer, autumn, and winter. Each season requires its own care, timing, and attention to detail—just like in nature.
🌱 Spring: The Great Restart
Spring marks the awakening of your pond from its winter slumber. As temperatures rise and life returns, it’s time to revive the ecosystem and restore balance.
- Clean the pond of debris, sludge, and organic matter left over from winter.
- Restart the filtration system and add beneficial bacteria to jump-start the nitrogen cycle.
- Perform a partial water change (20–30%) to freshen the water.
- Trim and repot aquatic plants to stimulate healthy growth.
- Test water parameters such as pH, ammonia, and nitrites as biological activity resumes.
- Resume feeding fish gradually once water temperature is stable above 10 °C (50 °F).
🌿 Watch for Spring pH Swings
Decaying plant matter and fish waste from winter can release ammonia and other nitrogen compounds, lowering the water’s pH and fueling algae growth. Test your water regularly during spring and remove decomposing debris early. Add beneficial bacteria to help restore biological balance faster.
☀️ Summer: The Season of Oxygen and Growth
Summer is the peak season of biological activity. While plants and fish thrive, increased temperatures require careful monitoring and oxygen support.
- Ensure proper aeration: Use air pumps, fountains, or waterfalls to maintain oxygen levels.
- Control algae naturally using UV sterilizers or barley straw.
- Prune plants regularly to prevent overgrowth and shading.
- Top up water levels slowly using dechlorinated water.
- Test water weekly, especially nitrate and oxygen levels.
- Add fish or plants gradually to avoid biological imbalance.
🍂 Autumn: Prepare for the Quiet Season
Autumn is a time of transition. Your actions now will decide how well the pond survives winter.
- Remove leaves and organic debris to prevent decay and water fouling.
- Install pond netting to block falling leaves.
- Trim back or remove sensitive plants that won't survive frost.
- Feed fish less often and switch to cold-weather food as temperatures drop below 15 °C (59 °F).
- Conduct a deeper water change (up to 40%) to refresh the system before winter.
- Clean and inspect equipment before cold weather sets in.
Before winter fully arrives, inspect the pond's structural integrity. Frost can crack brickwork or stone edging over time, especially if water gets into small gaps and freezes. Use pond-safe sealants to fill visible cracks and consider applying a protective geotextile layer under liners to buffer against soil movement and punctures.
Flexible liners degrade under prolonged UV exposure, especially if exposed above the waterline—cover edges with stone, mulch, or grass to extend their lifespan. This is the ideal time to check your liner, walls, and surrounding areas for signs of wear and perform any minor repairs before harsh conditions arrive.
❄️ Winter: Stability Through Stillness
Winter is about maintaining life support. Your goal is to preserve oxygen exchange and avoid disturbances.
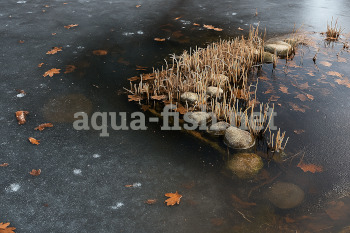
- Use a de-icer or pond heater to maintain a breathing hole in the ice.
- Do not feed fish if water temperature stays below 10 °C (50 °F).
- Turn off or insulate pumps and filters unless winter-rated equipment is installed.
- Check water levels occasionally; refill with dechlorinated or warm water if needed.
- Minimize disruption; fish and wildlife rely on calm, low-stress conditions to survive.
Following the rhythm of the seasons is key to year-round pond stability. Each task contributes to the health of your pond and all the life within it.
🛡️ Algae, Larvae, and Other Pests – Defending the Ecosystem
🌿 Algae Prevention: Strategy Over Reaction
Algae are a natural part of any aquatic system, but unchecked growth disrupts the ecological balance. Prevention is the most effective strategy:
- UV sterilizers – Destroy free-floating algae spores before they form blooms.
- Barley straw – Releases natural compounds that inhibit algae as it decomposes.
- Controlled feeding – Overfeeding increases nutrients like nitrates and phosphates, fueling algae growth.
🔬 Understanding Algae Blooms
When sunlight, nutrients, and warmth align, algae can multiply explosively. Signs include green water, floating mats, or slimy buildup. Common causes:
- Too much direct sunlight without shade or floating plants
- Organic waste accumulation (leaves, uneaten food)
- Insufficient filtration or low oxygenation
🌱 Duckweed and Invasive Plants
Duckweed can spread rapidly, blocking light and stifling underwater plants. Remove it using nets, rakes, or skimmers.
Other aggressive invaders include Azolla and Salvinia. Manual removal is the safest and most eco-friendly control method.
🦟 Mosquito Larvae – Nuisance or Nutrient?
Larvae are common in stagnant water—but fish love to eat them. A well-stocked, well-circulated pond rarely faces mosquito issues:
- Install pumps or fountains to keep water moving
- Let surface-feeding fish like minnows or goldfish access larvae
- Use floating plants to break up calm surfaces and reduce breeding spots
Mosquito larvae may also survive temporarily inside pond filters or quiet pipe sections. This is not a threat—any larvae flushed back into the pond become natural, high-protein snacks for your fish. There's no need for panic or chemicals; healthy ponds regulate larvae populations on their own.
In most cases, letting nature run its course is the most efficient mosquito control strategy. Fish do what they do best—hunt and eat.
🐌 What Eats Your Plants?
Snails and plant-nibbling fish (like koi) may damage soft vegetation. To minimize harm:
- Avoid overstocking herbivores
- Protect plant roots in mesh-covered baskets
- Choose sturdy species like Vallisneria and Anubias
- In cold climates, move frost-sensitive plants indoors before freezing temperatures arrive
🐠 Natural Cleaners – Plecos and Pond Snails
Certain animals help control algae by grazing on surfaces:
- Common Plecos (in warm climates) scrape algae from walls and decorations—but they need ample space and can't survive cold winters.
- Pond snails consume soft algae and decaying matter. They're low-maintenance and thrive under floating plants that offer shade.
Note: Avoid overpopulation—snails can reproduce rapidly if overfed or if nutrient levels are too high.
🧬 Disease and Stress from Water Quality
Algal overload, decaying material, and filtration failure can weaken your pond’s health. Watch for these early warnings:
- Gasping at the surface: Low oxygen or high toxins
- Faded color, sluggishness: Possible ammonia or nitrite spike
- Rotting or melting plants: Imbalance in light, nutrients, or water chemistry
Routine testing, partial water changes, and responsible feeding are your best defense. In the pond world, vigilance equals victory.
🧪 Advanced Solutions and Expert Tips
🏗️ Custom Concrete Pond Construction – Lessons from the Field
For those ready to advance beyond pre-made designs, building a concrete pond is the ultimate test of skill and commitment. Concrete offers exceptional strength, long-term durability, and total customization—but it requires proper technique and preparation.
Use steel reinforcement mesh, sturdy formwork, and pond-safe waterproofing additives in your concrete mix. Don’t skip expansion joints, and always compact and level the base thoroughly before pouring. Once cured, seal the surface with a fish-safe concrete sealant to prevent leaching. This method isn’t for beginners, but it stands as a monument to dedication and precision.

🛠️ Real-World Example: Building a Breeze Block Pond
When I built my koi pond, I used breeze blocks (cinder blocks) for the walls. I dug down 2 feet (61 cm) and raised the sides another 2 feet for safety and depth. The base was reinforced with heavy-duty paving slabs and covered in 3 inches (7.5 cm) of smoothed concrete. Pipes for the filter system were installed and sealed before rendering the inner surface with a mix strengthened with fiberglass strands. I applied two coats of clear pond paint and two dark green topcoats. Decorative bricks and coping stones completed the raised walls. The whole build took me four months, but the result was worth it. For beginners, flexible liners might be easier.
"Be creative. Forward planning is the key. You’ll find building your own pond isn’t as hard as it seems—just take it step by step."
– Mick, pond keeper since 1976
🧱 Above-Ground Ponds – Functional and Safe
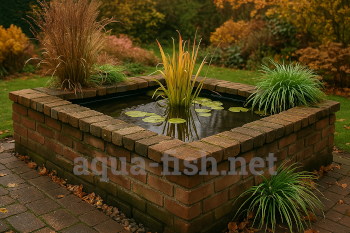
Above-ground ponds are ideal for small gardens, patios, and urban spaces. Built with materials like timber frames, concrete blocks, or modular liners, they offer:
- Enhanced safety – especially for homes with children or pets.
- Easy maintenance – better access and visibility.
- Contamination resistance – less risk from soil runoff or groundwater issues.
- Design potential – visually striking when paired with wood paneling, stone cladding, or planter borders.
These raised designs also offer peace of mind for pet owners. Older dogs or animals with mobility issues are less likely to stumble into a high-walled pond. The structure becomes a gentle barrier without compromising the view or access for care.
💡 Real-Life Examples – Practical Inspiration From Everyday Builders
- Brickwork Corner Pond: A raised concrete build with integrated steps, hidden filtration, and solar lighting. Fully DIY, completed over three weekends with reclaimed materials and basic tools.
- Balcony Oasis: A lightweight above-ground pond framed in wood on an apartment balcony. Floating plants and solar-powered equipment make it eco-friendly and apartment-safe.
- Suburban Garden Hybrid: A combination of raised and in-ground pond with natural bog edges, frog habitats, and decorative railway sleepers—an elegant fusion of nature and design.
💰 Budget-Friendly Pond Options – Smart Builds With Limited Means
You don’t need a fortune to start a beautiful and functional pond. With careful planning and reuse of materials, many pond keepers have succeeded on tight budgets:
- Plastic barrels or containers: Reuse food-grade barrels or tubs as mini ponds. Dig them in or raise them above ground.
- Heavy-duty tarps or farm pond liners: When pond liners are too expensive, thick waterproof sheeting (e.g. EPDM or PVC tarp) can be a stopgap solution. Always secure edges well and support sides.
- DIY filtration: Use buckets or crates filled with sponge, lava rock, or filter floss as makeshift filters. Add a small pump, and the system can rival basic commercial units.
- Recycled materials: Bricks, stones, tiles, and scrap timber can build borders or above-ground walls at minimal cost—especially if repurposed from renovations or salvage yards.
While these methods require creativity and extra maintenance, they prove that a beautiful pond is within reach for any builder. What matters is balance, not budget.
Whether you’re working with concrete, repurposed wood, or modular systems, these examples show how vision, planning, and determination can bring your pond dream to life. Let their success fuel your inspiration—and remember: great ideas grow where care and creativity meet.
📚 Frequently Asked Questions – Smart Answers That Work
💨 How do I aerate my pond effectively?
Use air pumps with diffusers (air stones), waterfalls, or fountains. During hot weather, oxygen levels drop—so it's crucial to keep the water moving. Aim for visible surface agitation, especially in summer. This supports fish health and prevents stagnation.
⚙️ What size pump should I use?
Your pump should circulate the total volume of your pond at least once per hour. For example:
- 1,000 gallons → 1,000 GPH (gallons per hour)
- 3,800 liters → 3,800 LPH (liters per hour)
If you're including a waterfall or fountain, add extra flow power to account for height and resistance.
🧽 How often should I clean my pond?
Skim surface debris weekly. Check mechanical filters monthly and rinse them gently to preserve beneficial bacteria. Vacuum sludge from the pond bottom in spring and autumn for deeper maintenance.
🧮 How do I calculate the volume of my pond?
Use one of the following formulas:
- US Gallons: Length × Width × Average Depth × 7.5
- UK Gallons: Length × Width × Average Depth × 6.25
- Liters: Length (m) × Width (m) × Depth (m) × 1,000
For irregular shapes, divide the pond into smaller sections, calculate each, and add the totals together.
🐟 When should I add fish to my pond?
Wait until your filtration system is running and water temperatures stay consistently above 10 °C (50 °F). Acclimate new fish gradually—float the bag for 15–30 minutes, then slowly mix pond water before release.
💧 How much water should I change and how often?
Change 10–20% of the water monthly to maintain quality. In spring and fall, a larger change (25–30%) can refresh the system. Always use dechlorinated water, and try to match the pond's temperature to avoid shock.
❄️ How can I protect my pond from frost, damage, and sun exposure?
- Winter: Use a de-icer or pond heater to keep a hole in the ice for gas exchange.
- Autumn: Install netting to keep out leaves and debris.
- UV protection: Use UV-stable liners and add shade or plant cover to reduce sun damage.
- Puncture protection: Use a geotextile underlay beneath liners to prevent root or rock damage.
☠️ What is the humane way to euthanize a suffering fish?
Clove oil (eugenol) is considered humane. In a separate container, slowly add diluted clove oil until the fish is sedated, then increase the dose. Avoid freezing or flushing—these cause unnecessary suffering. Always research and measure doses carefully.
🌱 How can I protect pond plants from frost?
Before the first freeze, remove tropical or sensitive plants and overwinter them indoors in moist soil or water containers. Hardy species can often stay outside, but trim dying foliage to reduce rot and debris.
If you have more questions, explore our other sections or reach out using the contact area below. Your pond journey is just beginning—and we're here to help at every step.
🎨 Garden Pond Design – Where Function Meets Beauty
✏️ Planning the Pond’s Appearance
Before you begin digging, envision your pond as a living part of your garden. Choose between geometric shapes (formal rectangles, circles) or more natural, organic outlines that mimic real water bodies. Raised ponds with brick or stone sides add structure and visibility, while in-ground ponds blend seamlessly into nature.
Edges can be finished with natural stones, brick walls, or gently sloping grass. Create safe, non-slippery borders—both beautiful and functional.
⛏️ Excavation Methods – Manual vs. Mechanical
Once your pond shape is marked out with string or a hose, the real digging begins. For small ponds, digging by hand with a spade is possible—but it’s labor-intensive and time-consuming.
Larger or deeper ponds benefit from renting a mini excavator (bobcat) or hiring a contractor. These machines speed up the job and allow for more precise excavation. Be sure to mark utility lines beforehand and use level guides to control slope and depth.
A well-dug foundation minimizes future issues like liner stress, soil erosion, or drainage problems. Whether digging by hand or with machinery, take your time to shape shelves, planting zones, and smooth contours—what’s underground determines how well your pond holds up above ground.
🏞️ Integration into the Garden
Location matters: place the pond where it receives morning sun but has some afternoon shade. Avoid overhanging trees unless leaf netting is installed. Ensure nearby access to electricity and water. Plan for safety—especially with children—by using non-slip paths and gentle slopes.
Always check for buried cables or pipes before digging. A well-integrated pond feels like it has always belonged to the landscape.
🌿 Planting Around the Pond
Use marginal plants on pond shelves—these include iris, cattails, or pickerel rush. In shallower boggy areas, add meadow and marsh plants like sedges and loosestrife. Select sun-loving species for open areas and shade-tolerant ones for corners under trees.
The goal is a natural transition between pond and garden—where vegetation flows outward like ripples from a stone.
🌱 Quick Tip: Simple Bog Zone for Marginal Plants
Want to add a naturalistic marsh area near the pond’s edge? Excavate a shallow depression about 6 inches (15 cm) deep, lay down a leftover piece of pond liner, and refill it with soil. This retains moisture and creates ideal conditions for bog plants like irises, reeds, or marsh marigolds.
🏗️ Decorations and Features
Consider waterfalls, streams, or fountains to create movement and sound. Install stone pathways, arched bridges, wooden pergolas, or even gazebos for relaxation and visual layering.
Lighting is key: solar lights around the edge, underwater LEDs, or spotlights for trees and features add both beauty and nighttime safety.
🌸 Inspirations from Japanese and Other Styles
Draw inspiration from koi ponds: wooden bridges, curved pathways, and shaded pergolas offer peace and elegance. Let vines climb over trellises, add sculpted gravel or moss—combine natural and cultural harmony.
The pond becomes a place of reflection, literally and figuratively—your own meditative sanctuary.
🏡 Real-Life Touch: Mick’s Pergola and Evening Lighting
Inspired by Japanese koi pond design, Mick built a brick-raised pond topped with a pergola. He added solar spotlights to highlight the water and climbing vines for natural shade. Subtle lighting extended into the surrounding paths and planting beds, turning the pond into a serene evening sanctuary.
💦 Fountains – Beauty, Oxygen, and Tranquility
Fountains do more than please the eye; they oxygenate the pond and deter mosquitoes. Choose from:
- Bell (Dome) – Smooth, circular water dome; elegant and quiet.
- Blossom – Multi-ring spray, reminiscent of a flower in bloom.
- Frothy – Dense, aerated spout ideal for oxygenation.
- Statue Fountains – Sculptural, eye-catching, perfect for themed gardens.
Many kits include multiple interchangeable heads, so you can experiment with different spray patterns. This flexibility allows you to adjust both the appearance and splash radius to suit your pond’s size and style.
Select a fountain that fits your pond's size and depth to avoid excessive splashing and water loss. Many models allow integrated lighting—LEDs, solar spotlights, or even colored effects for night ambiance.
⚙️ Performance Tip for Fountain Pumps
If your fountain head sits far above the pump (e.g., on a raised structure or through tall tubing), the water pressure may drop. To maintain a strong spray, either upgrade to a higher-capacity pump or elevate the pump using a stable stand directly below the fountain. Reducing the vertical distance helps ensure steady water flow and prevents weak trickles.
Some fountains work as part of your filtration system, combining beauty with utility. Prices range widely—from budget kits (~£30) to large artistic installations costing thousands.
Solar floating fountains offer a cheap, eco-friendly solution. Just make sure to secure them in place so they don’t drift into corners or block skimmers. To prevent solar fountains from drifting to the pond’s edge or blocking equipment, consider securing them with a soft net, anchored fishing line, or small weights placed discreetly below. This ensures steady positioning without compromising the look.
Popular and trusted brands include Hozelock and Oase. Hozelock offers budget-friendly kits starting around £25 (~$50), while Oase products are slightly more expensive but built to premium standards. Always match the pump’s flow rate and lift height to your pond’s needs.
Whether your style is rustic or refined, the aesthetic design of your pond is a canvas—painted with plants, light, movement, and imagination.
📏 Common Unit Conversions for Pond Builders
- 1 US gallon = 3.785 litres
- 1 UK gallon = 4.546 litres
- 1 foot = 30.48 centimeters
- 1 inch = 2.54 centimeters
- 1 cubic meter (m³) = 1,000 litres ≈ 264 US gallons
Using correct unit conversions helps ensure accurate measurements for pond volume, filtration capacity, and chemical dosing—no matter which system you're used to.
🌍 Conclusion: The Pond as a Path to Renewal
Building a pond is not a luxury—it is a conscious, meaningful act. In a world shaped by concrete, noise, and convenience, creating a living water ecosystem is an expression of care, connection, and long-term vision.
A pond is not just “a hole filled with water and fish.” It is a functioning ecosystem—where plants purify the water, animals interact, and every element plays a vital role. In maintaining this balance, we learn to respect the broader systems of nature—forests, rivers, skies.
Those who understand a pond, understand nature. And those who understand nature, know their place within it—not above, not outside, but part of it.
Every pond keeper becomes a guardian of nature. Whether it’s a modest backyard oasis or a shared community feature, a pond teaches patience, attentiveness, and the beauty of harmony.
A pond built with care and intention is not just beautiful—it is a gift to life. It anchors us, enriches the landscape, and offers refuge to creatures often forgotten amid the rush of modern life.
This is not luxury. This is renewal. This is a quiet return to what matters most.
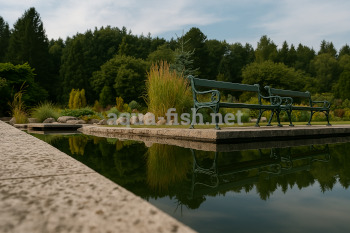
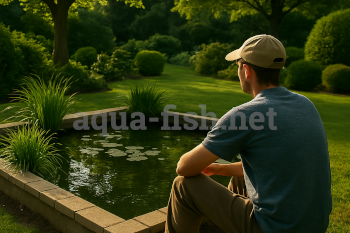
This image captures a moment of rest beside a thriving garden pond—a reward for patience, planning, and care. A reminder that ponds don’t just hold water—they hold meaning.

