Cookies seem to be disabled in your browser, therefore this website will NOT work properly! Please, consider enabling Cookies in order to maximise your user experience while browsing.
Recent discussions at Aqua-Fish+
  1. TheFishWorks at A guide on growing aquarium plants with FAQ, forum and species on
  2. Salviashaman at A guide on caring for Congo tetra (Phenacogrammus interruptus) on …display more of the recent discussions
  3. Salviashaman at A guide on setting a South American blackwater stream biotope aquarium on
  4. Figureguy at Chemistry of Aquarium Water with FAQ on
  5. Jackson20 at A guide on feeding aquarium fish frozen foods on
  6. Senator Wisdom at Bloodfin tetra (Aphyocharax alburnus) on
  7. CayceR at A page and forum devoted to keeping Blood parrot cichlids on
  8. Ness at A guide on raising African Dwarf Frogs with pictures and forum on
  9. Terry Mitchell at A guide on breeding, feeding and caring for L333 Pleco on
  10. Terry Mitchell at A guide on breeding, feeding and caring for L333 Pleco on

Detailed guide on fish acclimatisation

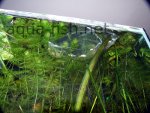
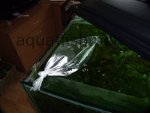
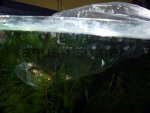
Initial fish acclimatisation - bag in tank, resized image 1 Initial fish acclimatisation - bag in tank, resized image 2 Initial fish acclimatisation - bag in tank, resized image 3

Brief Description

This page explains all details of proper acclimatisation of aquarium fish. If you still need help, use a forum that's under the article for asking questions or sharing experiences, please!

Acclimatisation is a very important process when adding new live stock to your aquarium. I have heard several times over the years numerous fish keepers stating that they don't bother with this process and just add the fish straight to the tank without any ill effects, short term this may be true but over time it can increase the risk of infections of illnesses to the fish and it can also shorten the lifespan of your fish so overall missing out on this process is not a great idea for your fish or for your purse strings as you then have to replace the fish that have been lost.

So why do we need to acclimatise the fish properly? Some fish are hardy and can stand a moderate change in water conditions immediately but the majority of fish need to be introduced to the water conditions of your aquarium slowly so that they can adjust without suffering any ill effects. The most widely known problem can be pH shock, the fish that you purchase in the aquatic store may look nice and contented, be feeding well etc. but they have also been introduced into these tanks following the acclimatisation process, when you purchase the fish they are usually placed into a bag and can be stressed during the travelling from the store to your house, this can weaken the immune system of the fish so a sudden change in pH can quite literally send them over the edge and cause complications. Even a small change of the pH, say from a pH of 7.2 to a pH of 7.6 can cause a shock in the fish so mixing the water slowly is a must.

Water temperature also has to be considered when adding new livestock to your aquarium. Sudden changes in the temperature can also bring out a shock effect in the fish, balancing the temperatures before adding you new pets into their new home is not difficult so why miss out this step just to save a few minutes of your time, fish cost money as well as considering their health, would you throw money away in other circumstances, its not worth taking the risk in this situation.

There is a couple of methods that I use for acclimatising fish which are now going to be explained with easy to follow instruction:

Acclimatising with the fish in the bag

Preparation is key before you even go to fetch the fish from your aquatic store, the most important step to take at home is to perform a large water change in the aquarium, test your water to make sure that the parameters are of a high quality, even high nitrates, though not as poisonous as ammonia or nitrites, can have a detrimental to the fish added to the aquarium.

Turn off the lights if they are switched on, fish do not want to be startled by bright lighting when the bags are added to the aquarium, the bags will be floating at the top of the aquarium for a while so the lighting will be of a higher intensity than at the bottom of the aquarium.

If you are sourcing your fish from a reliable aquatic supplier then there are some major steps that the supplier will undergo whilst preparing your fish for their travel home to the new aquarium. All new deliveries of fish should have undergone a quarantine period to make sure that they are healthy enough to sell onto fish keepers and that they are not showing any signs of disease or infections. If a supplier tells that they received the fish only a few days earlier I would reconsider purchasing these fish, tell tale signs of problems will not have had time to emerge, if the fish have been quarantined correctly then they will be ready to be sold onto their new owners.

The fish should be bagged in front of you, there should be ample air space above the water in the bag, oxygen levels in the water rapidly decrease while the fish are contained within them, leaving air at the top of the bag allows more oxygen to be absorbed into the water. The corners of the bags should be taped down to prevent the fish from getting stuck in them during the travelling.

Now some species of fish possess spines that they can activate when stressed, the fish should be double bagged so that if a spine should puncture the inner bag, the outer bag will still hold the water. Even fish that do not possess spines should be double bagged just in case there is any leakage from a faulty bag. The clear plastic bags should then be placed in a paper bag or a dark plastic carrier bag, the diminished light should help the fish to remain calm whilst travelling.

The fish are now ready for you to transport back to your house but there are still steps that you need to carry out to make sure that the fish remain calm. Do not shake the bags if possible while carrying them, support the bags from underneath while they are in your hands to keep them steady and always make sure that they do not tip over if you are placing them in the car etc.

N.B If you are travelling for a long distance from the supplier to your house i.e. more than a couple of hours drive away, it is often best to transport them in small food grade buckets that have lids, air holes can be drilled into the lids to allow air to enter so that the fish get ample oxygen in the water. Some suppliers will pump pure oxygen into the fish bags to allow for longer travelling but not all follow this practice.

Upon arriving home, the water temperature in the bags needs to be balanced with the water temperature in the aquarium, this is performed by “floating” the bags on the surface of the water, it may help to turn down the water flow from any internal or external filters to prevent the bags from moving around the aquarium too much. Carefully take the bags out from the paper or carrier bag and undo them slowly, roll down the top of the bag as this will aid with the floating process forming a ridge in the bags around the top. Leave the bags floating for at least 20 minutes, after this time the difference in water temperature should have disappeared now allowing you to slowly mix the water from the aquarium into the bag containing the fish.

The fish will probably become more active at this stage and be taking an interest in the aquarium below but do not be tempted to add them yet. Using a small cup or beaker add some of the aquarium water to the bag and wait for 10 minutes to allow the water to mix. After this time you should remove a couple of cups/beakers of water from the bag and this water should be discarded into a bucket or similar vessel ready to be thrown away after the process is complete. While the fish were being transported in the bag they will probably have produced a lot of waste, you do not want to add this into your aquarium. Replace the water that you have removed from the bag with aquarium water and wait for another 10 minutes. This process should be repeated until all of the water in the bag has been replaced with aquarium water and the discarded water can now be thrown away.

The fish are now ready to be added to the aquarium but do not be tempted to just tip the bag to remove them, using a small net they should be lifted from the bag and gently placed into the aquarium, tipping the bag can cause the fish to become stuck in the polythene thus stressing the fish.

If you are transporting the fish from a private aquarium to your own, ask the sellers to refrain from feeding the fish for 24 hours before bagging them, this will reduce the amount of waste that the fish will produce while in the bag.

For delicate species of fish there is another acclimatisation method that I use with good results but this process can take up to a couple of hours to complete but is well worth the effort. This method is known as the “drip-line method” for reasons that will become obvious when you read the section below and this method is often used for salt water fish and I personally use this method for acclimatising Discus fish.

Acclimatising your fish with the “drip line method”

Using this method does take a little longer to set up and the process takes longer to complete compared to acclimatising your fish in the bag but with delicate species it does pay dividends and lets the fish settle into the aquarium better.

All that is required is a length of airline that reaches from the top of the aquarium to the floor, a regulator valve that is linked into the airline to control the flow of the water and a small food grade bucket to house the fish while they are being acclimatised.

Place one end of the airline below the water surface in the aquarium and open the regulator valve. The fish and contents of the bag should be emptied carefully into the clean food grade bucket, now you can syphon the water down the airline and once it reaches the bottom of the line close the valve so that it only allows one drop of water per second into the bucket. The top of the airline can be attached to the side of the aquarium with a small clamp or even a clothes peg making sure that you do not trap the airline but keeps it secure. This leaves both hands free to deal with the fish in the bucket.

As the water level in the bucket slowly rises you can remove some with a small cup or plastic beaker to prevent it from flowing over the top of the bucket. Allow the water to drip and keep removing the excess for at least an hour, by this time the fish in the bucket should be very active and can be added to the aquarium gently but don't forget to close the valve or you will have water all over the carpet.

Do I need to acclimatise when quarantining new fish?

Simple answer to this question is yes! Quarantining your fish before adding them to the main aquarium is a very good practice to prevent infections and parasites being added to the tank as well, the fish will still need to be acclimatised as the water parameters will be different from the suppliers so adding them straight to the quarantine tank is not advised.

The general rule is never to rush the acclimatisation process, keeping the fish calm as possible will prevent them from getting stressed, dimming the lights during the process will also help so taking this step should not be omitted. With experience you will soon be able to observe when your new fish are becoming active and keen to enter the aquarium, this is a good sign that the acclimatisation is well on the way but don't be tempted to add them too soon!

Please, verify whether your login and password are valid. If you don't have an account here, register one free of charge, please. Click here to close this box.

You have been logged out successfully! This box will close automatically!

Something went wrong during processing your message, please try again!

Your message has been sent, thanks a lot!

Page has been saved, refresh it now, please!

The page has been created, you will now be redirected!

URL already exists!

Path to the photo is not unique!

Really delete this page from the database?

The page has been removed successfully, you will be redirected now!

The page couldn't be deleted!!

Unfortunately this page doesn't allow discussion. Please, find any other page that fits your area of interest as over 99% of our pages allow discussion. The reason why no discussion is allowed here is this page is too general. Thanks a lot for understanding! Click here to search, please!

Really delete this comment from the site?

Really delete this image from the site?

Really delete this image from the site?

Selected comment has been removed successfully!

Selected image has been removed successfully!

Either login or email address is required

Account has been recovered, please check your email for further instructions